Tutorial :
Programming a simple castle
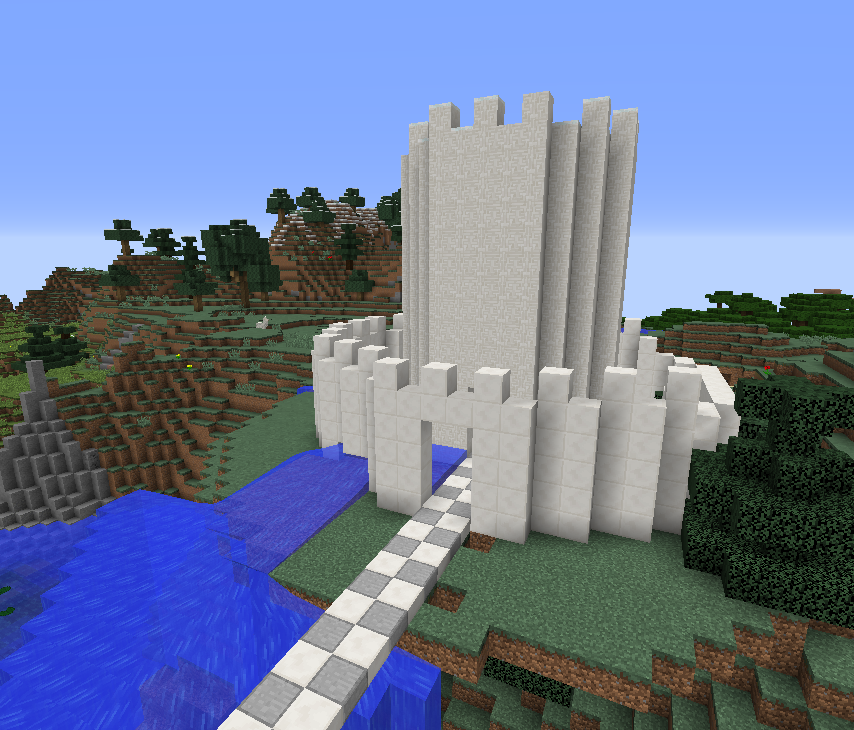
Basic Steps
This simple tutorial shows you how to create a program that generates a castle. You can easily adapt the program to your wishes to make the castle more fun.
This example is taken from the course material used in our teaching classes. The kids first try this example and afterwards they can free their creativity and make anything out of it.
The main steps in the tutorial are:
- Make an outside wall
- Make an inner tower
- Put water between the inner and outer walls
- Add a passage to not get your feet wet

Programming step 1
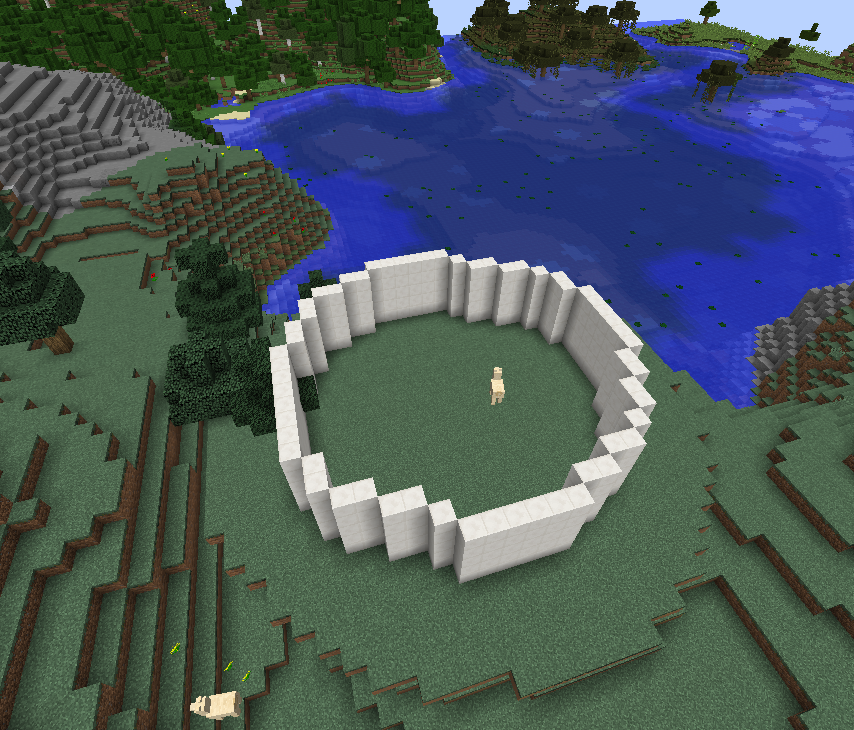
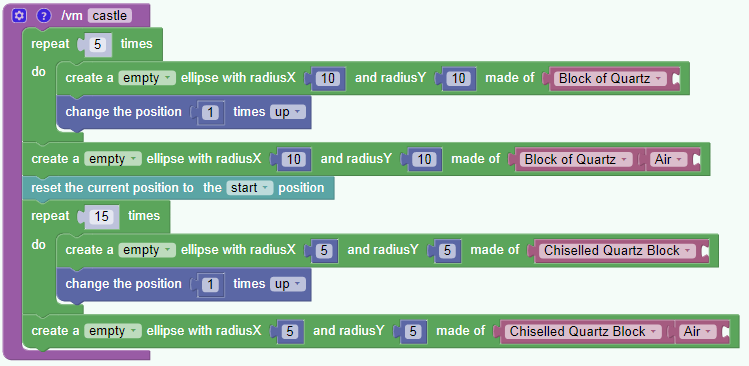
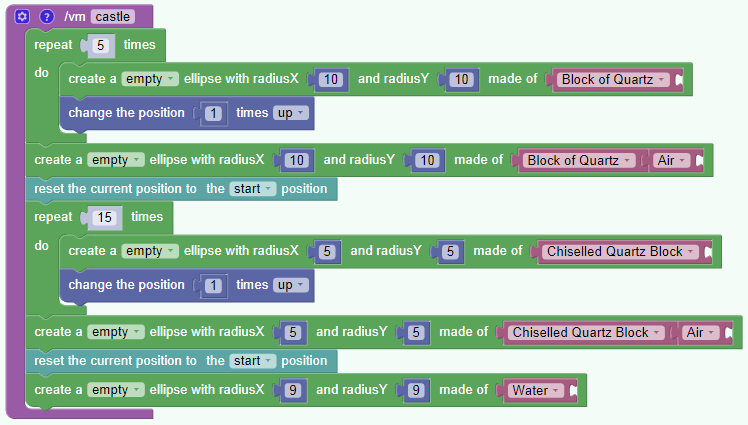
Let’s create the outside wall. We make a circle 5 times. After making a circle we go one step up.
Programming step 2
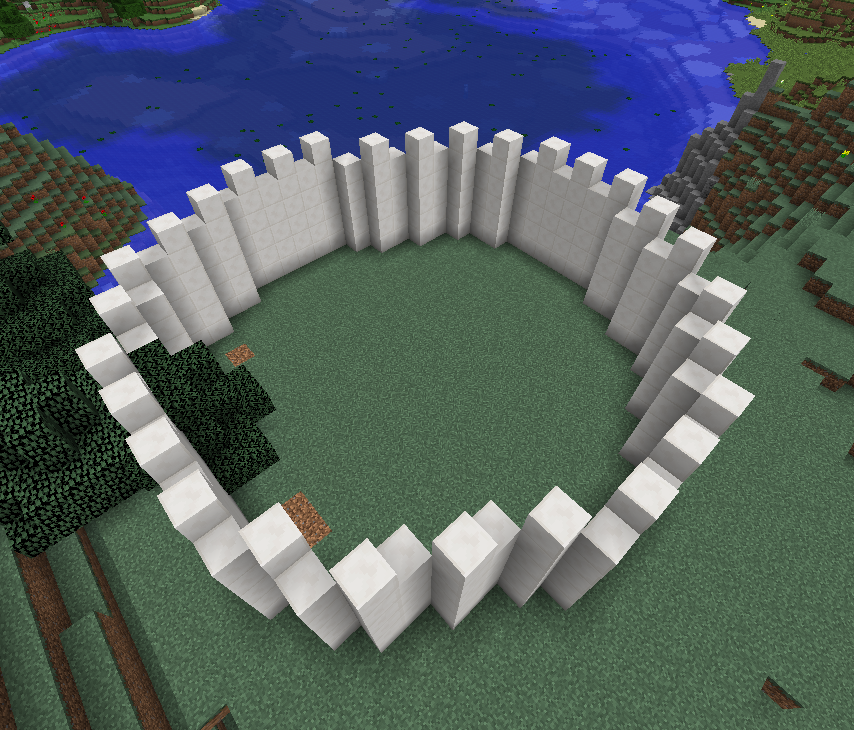
The wall is missing the battlements. We can easily add it by adding an air block after the block of quartz. The ellipse command uses the materials listed and when there are not enough materials it starts from the beginning of the list again.
Programming step 3
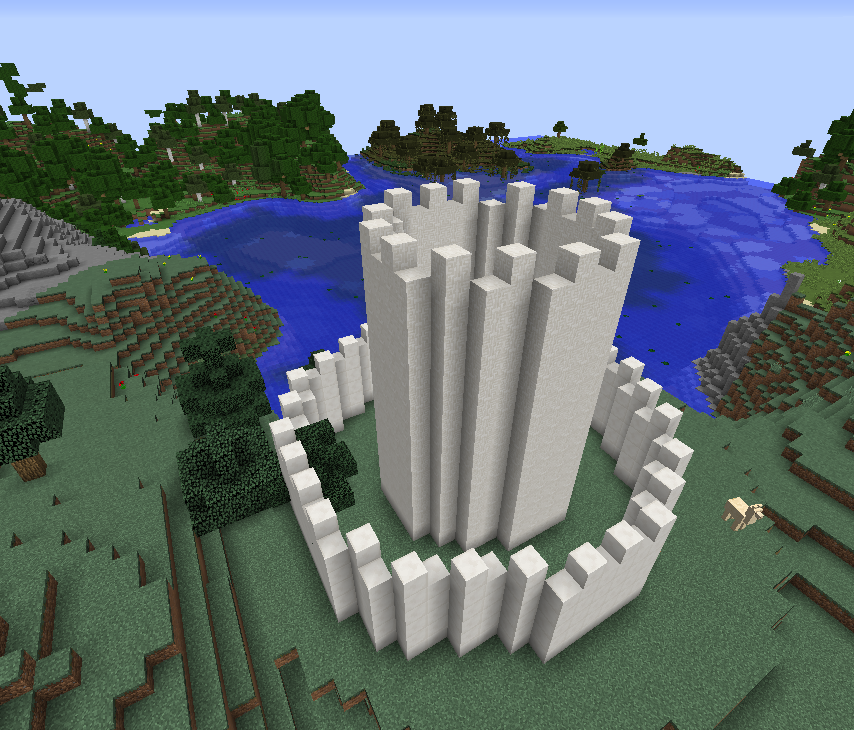
Let’s add a central tower using the same program from before. We just changed the radius of the ellipse.
Programming step 4
We add water between the two walls. For simplicity we add an ellipse made of water.
It could be more fun (and dangerous) adding hot lava.
Programming step 5
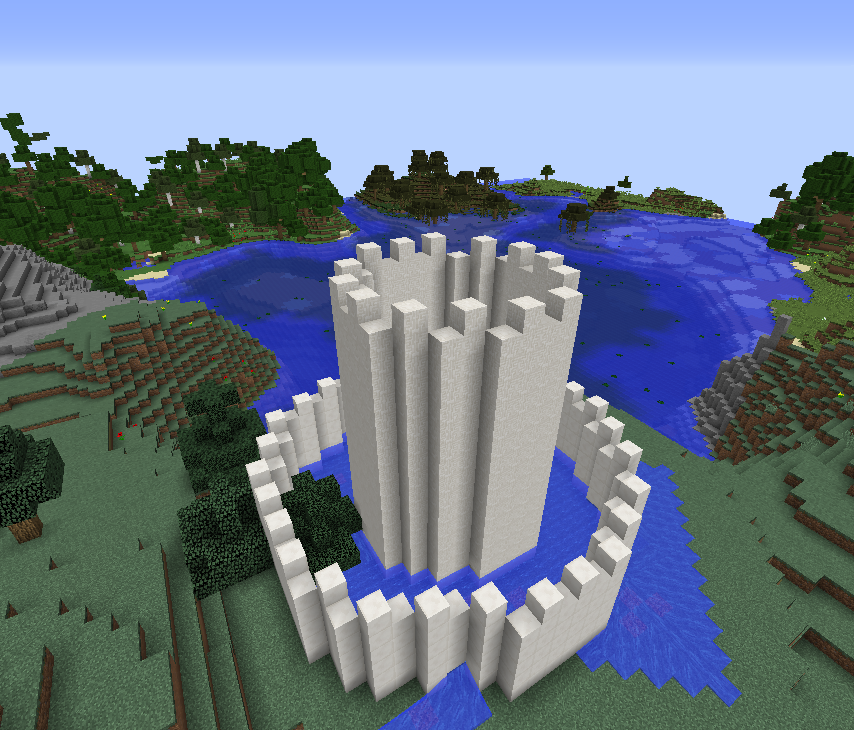
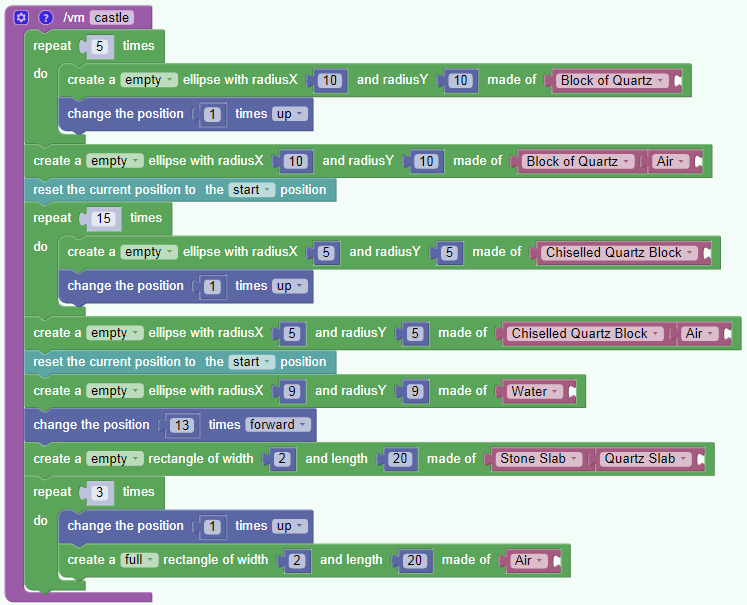
For the door we add a rectangle for the path made of two different materials and a rectangle full of air on top to create a hole through the wall.

With Visualmodder programming and modding Minecraft becomes very easy and it is a great way to to teach programming to children.

